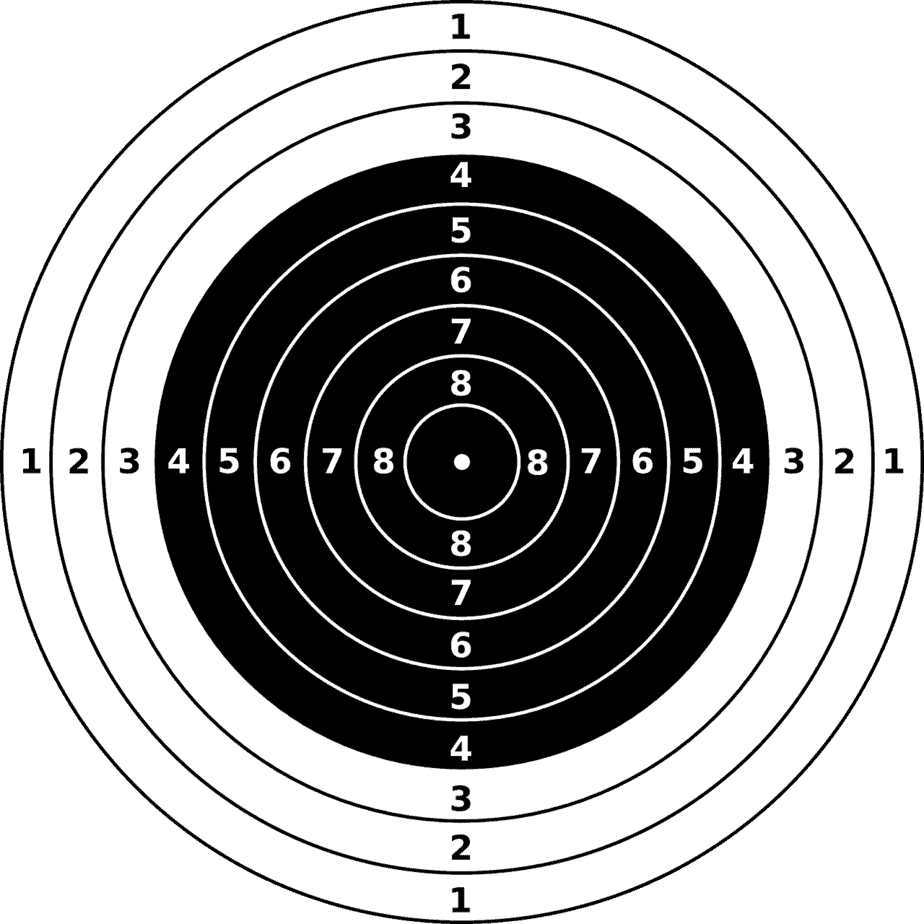
Shooting well requires skill and training. The goal is to hit the target every time.
You have a basic idea of how a gun works. You insert ammunition, point it at something, and pull the trigger. A speeding bullet exits the barrel and makes a hole in your target.
Now you would like to know how to do that consistently and well. To succeed at hitting the target, learn the seven fundamentals of marksmanship: grip, stance, sight alignment, presentation, breathing, trigger control, and follow through.
Grip
First you have to get a grip on your gun. Most importantly, KEEP YOUR FINGER OFF THE TRIGGER until you are ready to shoot. You don’t want to be startled by a loud noise from the next station at the gun range that causes you to turn and look that direction. Your grip will follow your gaze and your muscles will tense automatically, including your trigger finger.
One Hand Grip
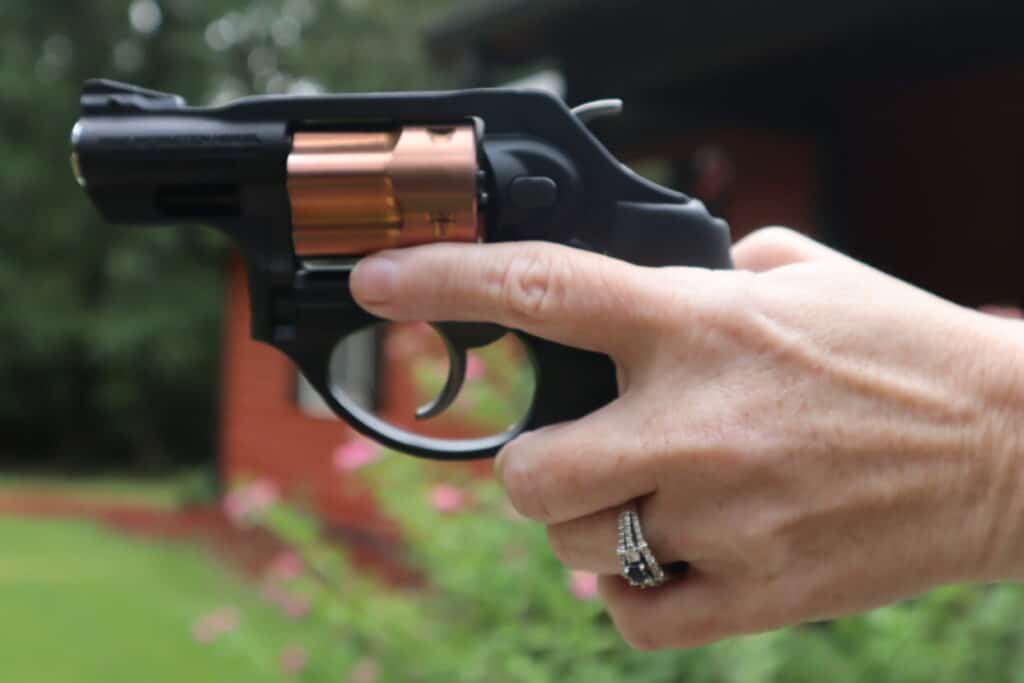
Your finger should lie along the frame outside the trigger guard. The “V” of tissue between your thumb and index finger should be as high on the backstrap as you can get it to avoid a pinch when the gun moves in response to the shot. This is especially crucial with a semi-automatic because the slide moves backward with each shot.
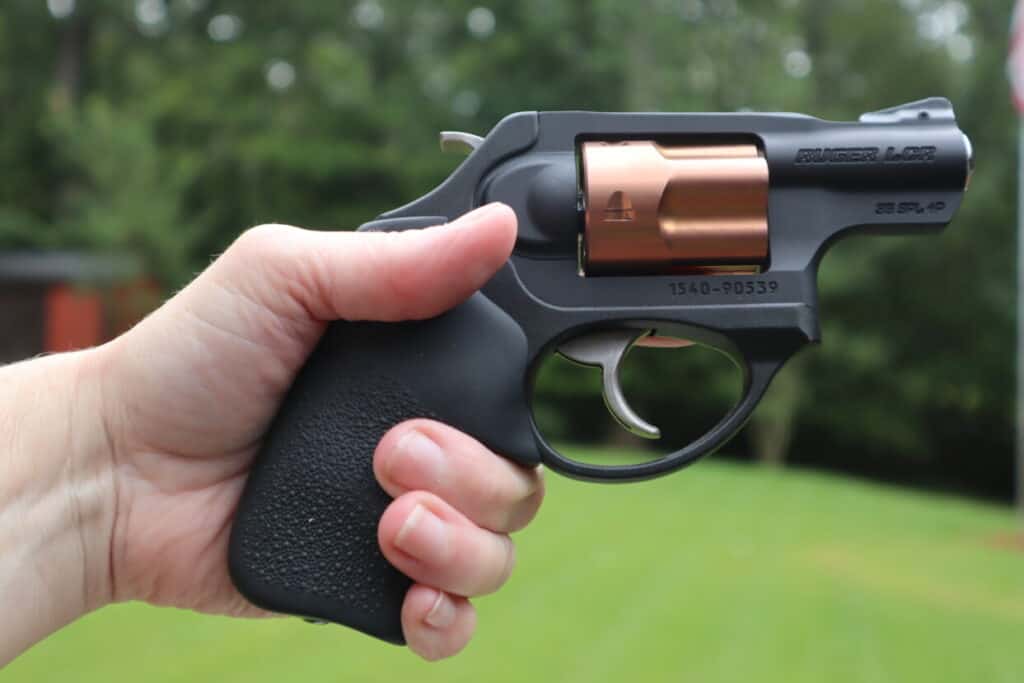
Align the backstrap of the frame with your wrist and forearm. Grip the handgun the same way every time you hold it for muscle memory. Once you have established a habit, your muscles will automatically do it the way you have practiced.
Two Hand Grip
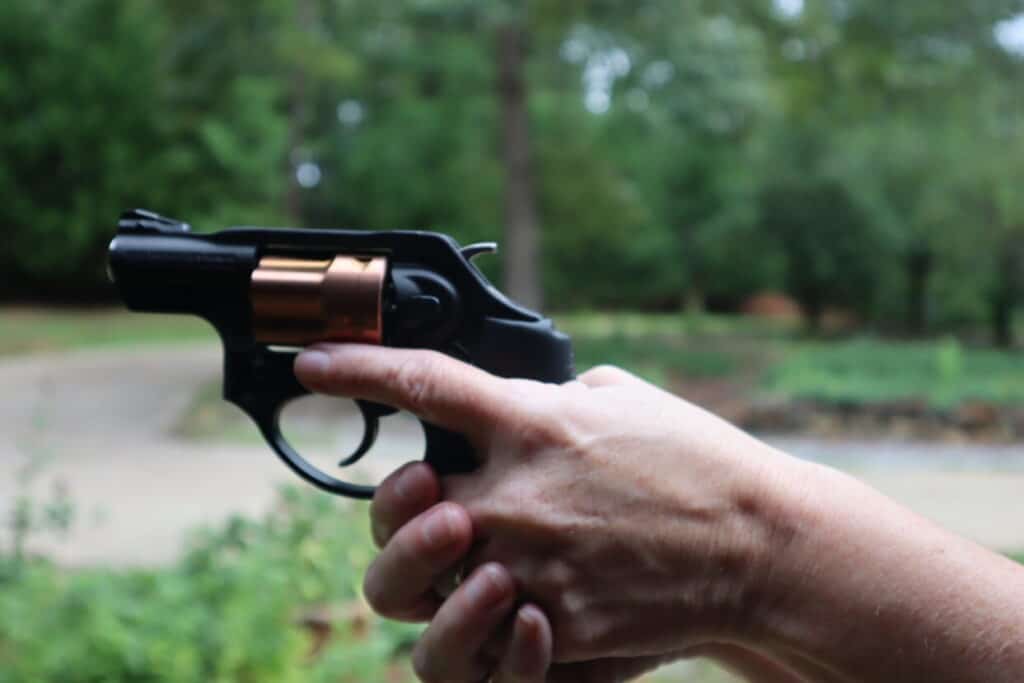
For a two-handed grip, wrap the supporting hand around the shooting hand. Don’t cup the shooting hand from below or you will lose your grip with the recoil after the shot. Your support hand is there to stabilize your grip.
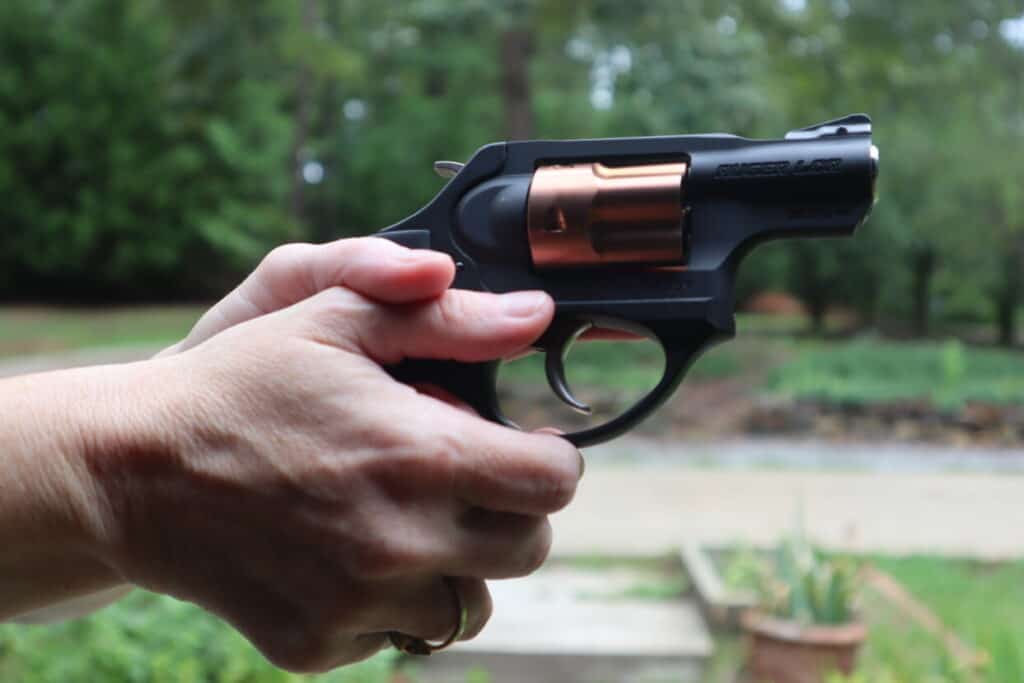
Dominant Hand Versus Non Dominant Hand
Most people shoot with their dominant hand because this is what comes naturally. As with sports and other activities, you may find that your writing hand is not your shooting hand.
Left handed people, having grown up in a right handed world, may find it easy to switch between hands. We already have to use the right hand for starting the car and unlocking the house door.
Using the opposite hand for a task actually grows neuronal connections between the halves of your brain. Those connections will come in handy when you have to switch hands due to an injury, as I did when I broke my left collarbone.
Incorporate Flexibility Into Your Practice
You want to have options when you shoot. You may find yourself in a situation where you need to defend yourself with your non-dominant hand because your dominant hand is holding someone you love.
Target shooting and competition shooting are planned events. You have time to compose your thoughts before you step up to the shooting area.
Defensive shooting requires a different outlook: you are responding to a threat in a place chosen by your assailant. You may need to shoot without a place to put down your belongings, in the presence of someone you need to protect, in the dark, perhaps while physically struggling with an assailant.
Practice shooting with your dominant and non-dominant hand, with both hands and with only one hand. I can shoot with either hand, without much difference in accuracy.
My right trigger finger actually has an advantage in strength because of my collarbone injury on the left. Shooting one-handed is more of a challenge, but I can do that too.
Stance
Your shooting stance makes a big difference in the accuracy of your shot. You need to be consistent. Make sure you are balanced, with your weight evenly distributed between your feet.
It won’t do to falter with a gun in your hand. Support the gun and hold it steady. Find a comfortable position for your practice shooting.
Isosceles Stance
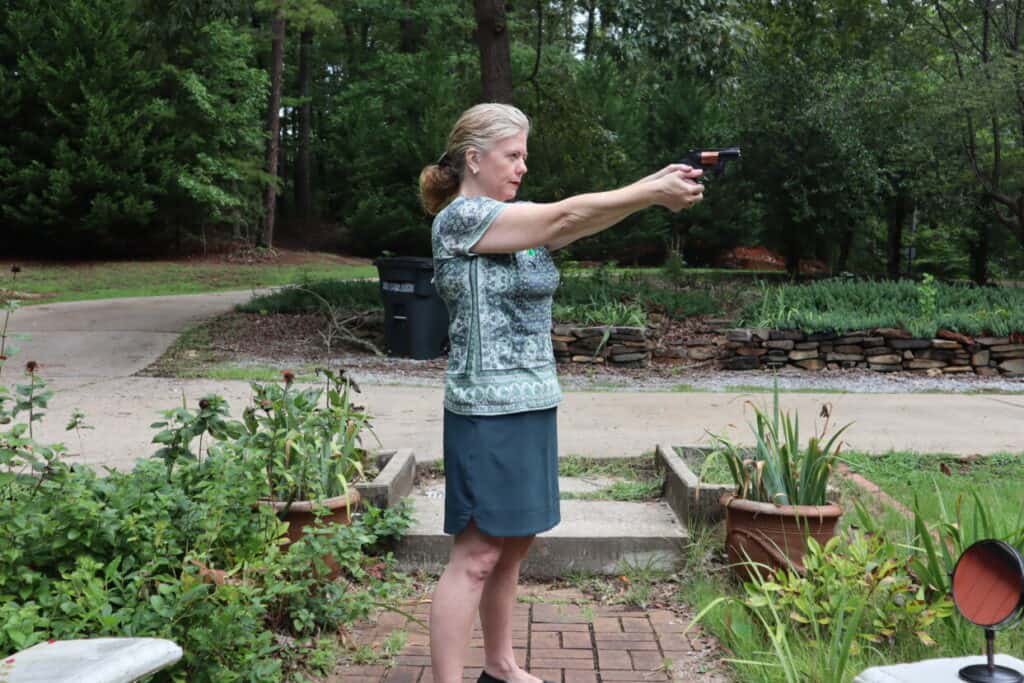
The isosceles stance is the classic shooting pose. Your feet are shoulder width apart, with weight distributed evenly between them. Your knees are slightly bent and your back is straight or leaning slightly forward.
Your head is up and your arms are fully extended, with the support hand wrapped around the shooting hand. Bring the pistol to eye level. Keep your shoulders comfortable and relaxed.
Weaver Stance
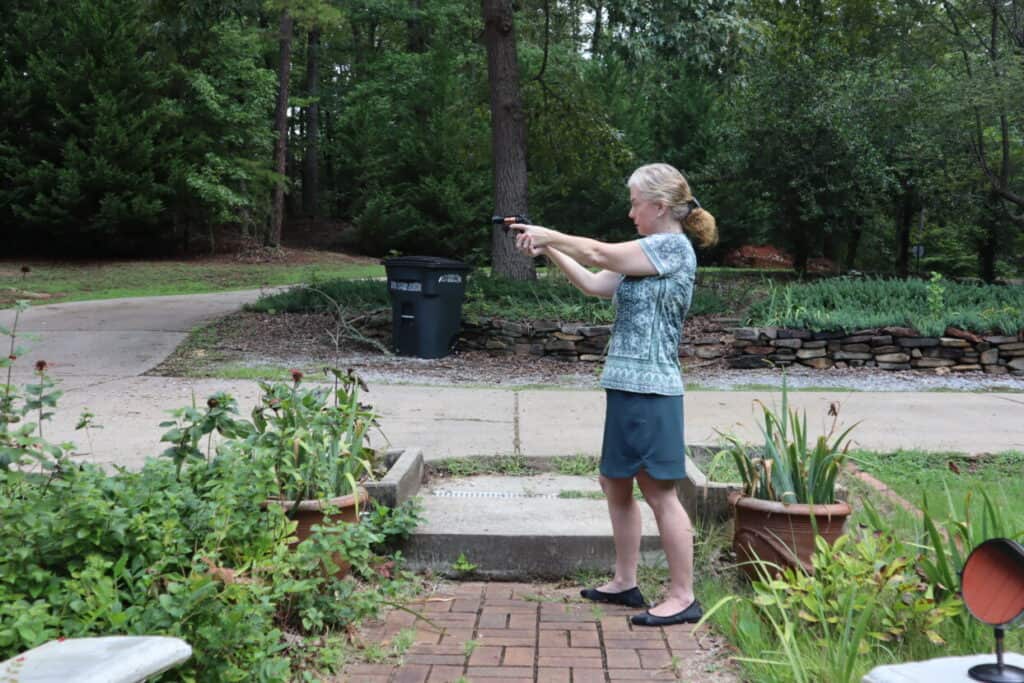
The Weaver stance also merits attention. You hold the pistol in your shooting hand and step your support foot ahead of your shooting foot. Bend your front knee slightly like a boxer.
Extend your shooting arm nearly fully with a slight bend at the elbow. Bring your support arm to the grip and bend it slightly as you cover the shooting hand with the support hand. This creates a slight push/pull on the pistol, where the shooting arm pushes and and supporting arm pulls.
Other Stances
Once you are comfortable shooting while standing, consider other stances. You may not be able to practice non-standing positions at your favorite shooting range, and you certainly want to ask before you try it.
If you need to practice different positions at home, unload your gun and triple check it every time you practice, then aim the muzzle safely away from people and pets.
Practicing in front of a mirror or even filming yourself can help you identify opportunities for improvement. When I shot the photos for this article I noticed that I have a tendency to extend the index finger of my supporting hand rather than wrapping it around the shooting hand.
Kneeling Stance
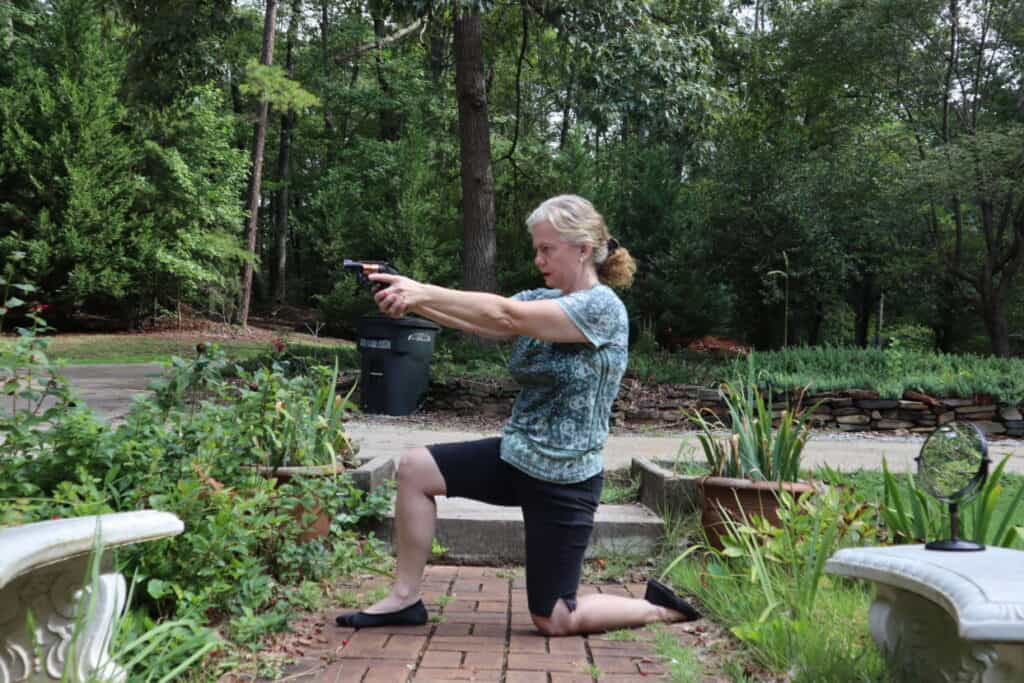
To kneel when you shoot, pick a softer place than I chose for my photo shoot. Place your support foot in front of your body, toes toward the target, and kneel on the knee of your shooting side. This is speed kneeling.
Experiment with the position of your legs; more flexible shooters can angle their legs differently and lower into more of a squat.
The double kneeling position places both legs into a bent position. You can then lower your backside to your feet for additional stability.
You can assume a braced kneeling position by resting the triceps of your support arm against your support knee.
Kneeling provides a lower profile if you need to take cover while you shoot. Kneeling is particularly popular among shooters of long guns because of the weight of the long barrel that you have to support with your arms.
Sitting
You can sit on a bench with a table in front of you and the gun on a stand. This is useful for long guns such as rifles and shotguns. It takes the work out of balancing a long, thin weight while aiming. I shoot a Henry Lever Action Rifle and a Ruger American Predator Bolt Action Rifle.
You can also sit cross-legged on the ground when you shoot. What you lose in mobility with this stance is gained in stability, and you make a smaller target in this position.
Prone
You can even shoot a gun while lying on your belly. Hunters and snipers use this stance to be nearly invisible to their target and maintain the most stability possible. Keep your elbows on the ground when shooting prone.
Whatever position you choose, remember to use good muzzle control when changing positions. Treating every gun as loaded and pointing only where you intend will save you from a negligent discharge as you concentrate on getting up.
Shooters come in all ages and health conditions, so I need to point out that getting up from a prone, kneeling, or sitting position should be done slowly.
Your body adjusts your muscles to keep your blood pressure from suddenly dropping when you stand up, and some people need more time to make that adjustment.
If it has been a while since you tried kneeling or lying on your belly, don’t try it with a gun in your hand until you know you can do it safely.
Sight Alignment
In order to hit the target you have to see where the bullet will go. This involves knowing your dominant eye and using the sights on your gun.
Determine Your Dominant Eye
To determine your dominant eye, hold your arms straight out in front of you at eye level. Form a square with your hands. While focusing on a distant spot, bring your hands to your eye. Your hands will come to your dominant eye.
I had to do this several times because my hands kept coming to the middle. I am left eye dominant, but I can shoot while focusing with either eye. Does that make me ambioptic?
Using Your Sights
You aim the gun by looking down the barrel. The manufacturer will have given visual cues to predict the trajectory of the bullet. My Ruger LCR has a groove that starts in front of the hammer and ends with a raised area at the tip of the barrel. You may have red or white dots to guide you.
Shooting enthusiasts purchase enhancements for their gunsights, from better dots all the way to laser lights that project a red bullseye onto the target for you.
Align the top of the front sight with the top of the rear sight. Focus on the front sight. Keep both eyes open to use depth perception.
I personally like to alternate between both eyes open, left open, and right open. You never know what will be happening with your eyes in a real defensive situation. Just don’t shoot with your eyes closed.
Keep the blade of the front sight in the middle of the notch for the rear sight.
Point Shooting
You also have the option of learning point shooting. Instead of using sights, the shooter uses natural aim. To find the natural point of aim, close your eyes and move the gun in small circles and back to the natural center.
You may notice the gun is not dead center when you open your eyes. Move one foot forward or backward to correct your aim.
Presentation
How you present the gun makes a difference in your aim. We tend to practice from a low ready position, with arms down in front of us until it is time to shoot, or from a high ready position, with the gun at chest level until we are prepared to aim and fire.
These positions are great for developing aim, stance, grip and trigger control. They do not prepare you for the day when you have to pull your gun out of concealment and use it.
Drawing from the holster is not allowed at some gun ranges, so ask before you try it. If you need to practice drawing at home, empty your gun and triple check the chamber before you start. Stand in front of a mirror and practice drawing from the position you use to conceal your gun.
Practice makes perfect because of muscle memory. Just as a daily routine makes you start driving to work if you are too distracted to remember that you have the day off, your muscles will get into a rhythm with any activity that you practice on a regular basis.
If you carry your gun in several different positions, practice all of them. You want to have a smooth draw that allows you to get the sights up to your eyes quickly so you can hit the target the first time.
Breathing
When I shot a rifle with a scope for the first time, I noticed that the movement of my breathing made the picture move in and out of focus. I needed to stop breathing long enough to aim and fire.
You have a natural pause between exhalation and inhalation. Breathing is both automatically controlled by your body and volitionally controlled. If you try to observe your breathing now that you are thinking about it, you will become self-conscious and change your breathing pattern.
Instead, find someone who is not paying attention to you (or someone on television) and watch the breathing go in and out. The little pause at the end of exhalation is normal, and that is the optimal point in the breath cycle for aiming and shooting.
In a defense situation you do not have time to find just the right moment in your breathing. You can take a deep breath and hold it while you aim and shoot. Then quickly go back to breathing normally. Or just focus on shooting and don’t even think about the breathing.
If shooting is making you very tired, you could be holding your breath too long. Don’t make yourself dizzy. Breathe normally and just pause for a moment at the instant of aiming and shooting.
Trigger Control
Finally you get to pull the trigger! The prerequisite to trigger control is trigger discipline. Keep your index finger aligned with the barrel until you have verified your target and you are ready to pull the trigger.
If you are using a semi-automatic pistol, rack the slide with your nonshooting hand. Cock the hammer with either thumb (you will have a preference) if you are firing a single action gun.
Place your finger on the trigger with the trigger somewhere between the tip of the finger and the first joint. You will find a position you like based on the length of your finger and the strength of your joint compared to the space you have and the weight of the trigger pull.
Press the trigger straight to the rear with smooth and continuous pressure. Don’t anticipate the moment of firing. It should be a surprise.
A trigger pull that is too heavy will make you struggle to keep good form, so make sure you have a gun that does not overtax your finger strength. If you have a double action/single action gun you can decrease the trigger pull weight by cocking the hammer manually before you shoot.
If your gun has a very light trigger pull weight, be careful! A hair trigger may go off before you expect it to do so.
If you have a gun with a very heavy or light trigger pull weight, a gunsmith may be able to adjust it for you. It might be worth the effort for a family heirloom or a gun that has all the other features you prefer.
Follow Through
When you watch golf or baseball, you notice that the club or bat keeps moving after the ball has been hit, and this affects where the ball ends up going. The same is true for your bullets.
Follow through by keeping your stance the way it was before you fired. It is impossible to hold completely still, but the bullet will follow an arc as it exits the barrel.
If you find yourself flinching at the end of each shot, you may have a gun with too much kick. Small guns are great for concealability but the sharp percussion in your hand may be too much while you are developing your skills.
Step back to a larger gun or smaller bullets while you learn proper form, then resume training with a smaller gun or bigger ammunition when you have overcome the flinch. A .22 is a good starter gun for new shooters who are still a little wary of the process.
Practice, practice, practice. The way you prepare is the way you will perform when the time comes to use your gun.


